
Customer Help Portal
New Access Code Installation Instructions
1) Ensure your dongle matching the Dongle Tag Number provided, is plugged into your computer, and open your Wilcom DecoStudio or Wilcom EmbroideryStudio Software.
2) Attached to this email is a .TXT file titled “AUTOMATIC” followed by your dongle number. IE: “AUTOMATIC-E3XXXXX.TXT”. Save this to your Desktop or somewhere you can easily find later.
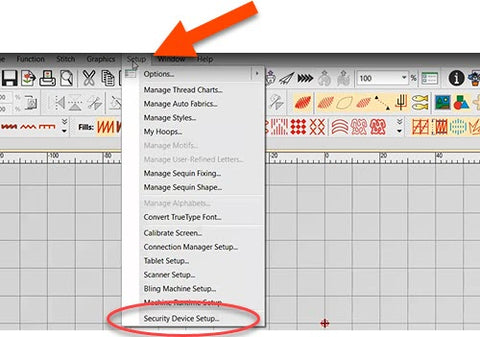
3) From the Setup menu, select Security device setup….
The security device dialog will appear. Click on the Import Codes… button.

4) Browse to the folder where you saved the codes file in step 2 of these instructions.

5) Select the AUTOMATIC file, and click Open.
6) The codes will now automatically be installed and you will be prompted when complete.

7) Note the changed Identity Code in the Security Device dialog. Ensure the Identity Code in the Security Device dialog box matches the new identity code .
8) Click OK and close the Security Device dialog.